

The high quality of automotive headlights runs a reasonably vast gamut. They’re so variable, even on new vehicles, that the Insurance Institute for Highway Safety (IIHS) had so as to add a headlight class to its testing and make a very good rating a requirement for its Top Safety Pick Plus award. On older vehicles, issues get means worse.
For instance, your outdated automotive may have shitty sealed beam headlights which might be a decade outdated and put out about as a lot gentle as a mouse holding a (mouse-size) candle. Or, like me, your automotive may have had superior bi-xenon projectors when it was new 20 years in the past, and the ravages of time and use have made them decidedly craptacular.
Part of the degradation of my headlights stemmed from the UV injury they’d skilled over twenty years within the California solar, which, in the event you’re a fan of Project 996, you’ll know I remedied with quite a lot of sanding and somewhat 2K clearcoat. While getting the lenses clear once more positively helped my gentle output, it nonetheless wasn’t what I felt it must be, and driving at night time nonetheless sucked.
This meant it was time for one thing somewhat extra drastic, and by that, I imply new projectors. Technically, that is sort of taking the nuclear choice since I had no thought how outdated the headlight bulbs had been (most likely authentic) or how good the ballasts had been (additionally authentic). Still, after doing a little analysis, I made a decision that this was the best way I ought to go, and conveniently, a Dutch firm referred to as The Retrofit Lab makes a projector improve equipment for my second-generation 911 headlights, and it was solely $169 for the equipment and one other $148 for brand new Phillips bulbs, so I ordered it.
Buy headlight restoration kits: Amazon
(Full Disclosure: When The Retrofit Lab came upon I used to be doing a narrative on my headlight improve, the parents there prolonged me a small low cost on the elements which might be made in-house. It was very nice of them, however I used to be going to purchase it anyway.)
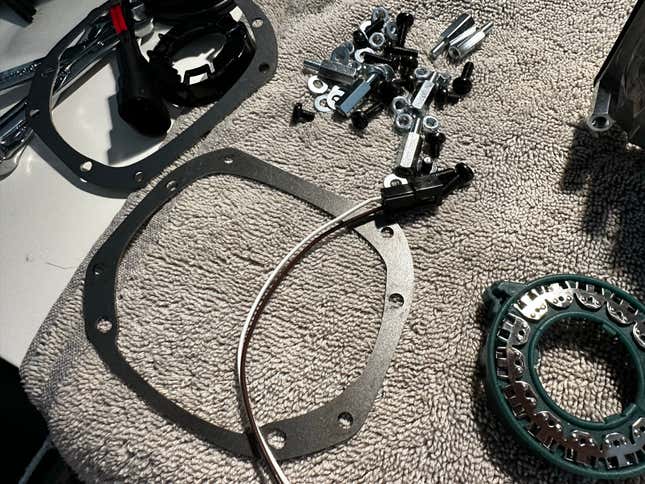
The Retrofit Lab equipment is fairly rad. With quite a lot of headlight upgrades, you find yourself having to take away the lenses or minimize into the housings, and so on. In my case, I didn’t must do any of that. After watching TRL’s how-to video, it appeared like I’d simply must take away the outdated projectors, save their mounting body, and bolt some laser-cut brackets on the brand new Optimus projectors to set the correct depth since they’re far more compact than the unique Hellas. In apply, it was somewhat extra concerned than that.
First, I need to preface by saying that that is really a comparatively simple improve to do, even in the event you’ve by no means achieved a headlight improve earlier than. The downside is that The Retrofit Lab’s how-to video (which is the one type of directions included with the equipment) reveals the set up on a set of halogen lights, that are related however not the identical because the Litronic bi-xenon lights, and it begins mid-process with the rear cowl taken off of the lights already. Not best.
Luckily, I discovered a video of a man doing the set up on his Litronic bi-xenon lights that reveals the variations and elements of the method which might be missed by the unique video. Following this video, I used to be capable of do the improve on my first headlight in round an hour and a half, which included a number of cleansing and changing different bulbs. I did the improve inside my workplace in a clear house with good lighting, which positively helped, as did having the correct instruments.
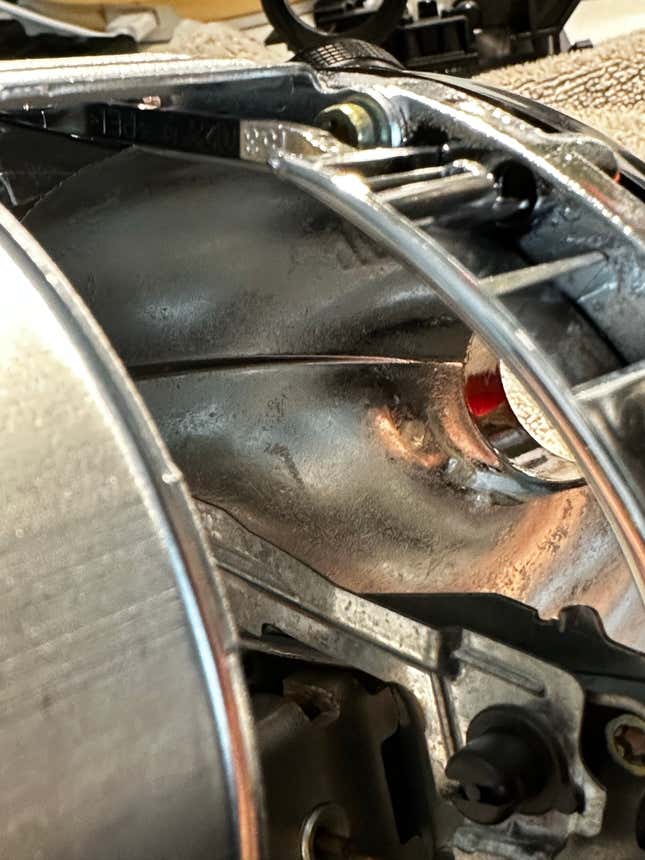
To get issues disassembled, there are principally Phillips and Torx screws to take away, in addition to a few electrical connectors and a few plastic ball-and-socket joints. One of the large areas that the manufacturing unit xenon lights differ from the halogen projectors is that the place the halogens have three screws holding the body to the headlight housing, the xenons have 4, and the fourth one is sort of completely inaccessible. I’d by no means have identified this with out the opposite video and would have been tremendous annoyed. I used to be capable of get the final screw out as a result of I used to be utilizing the iFixit Mako precision driver equipment that I usually use to work on PCs, and it has a versatile shaft extension; I’d contemplate one thing like this obligatory for doing this improve.
Putting stuff again collectively is fairly easy, with solely a pair powerful or tough elements, and these are documented nicely between the 2 set up movies. In addition to your screwdriver, you’ll additionally want a 7mm wrench, a ¼-inch ratchet and a 7mm deep socket for attaching the laser minimize bracket and standoffs to the brand new projectors.
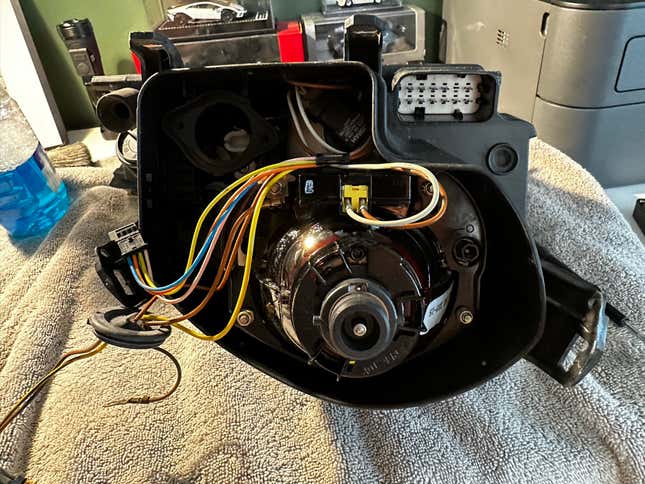
One of the opposite large potential obstacles with this course of is the wiring. The adaptor harnesses that The Retrofit Lab offers you’re superior and work nicely, although a few them are usually not tremendous clear as to polarity, so that you’ll want to take a look at a wiring diagram. The actual challenge is the age of the inventory wiring. After 20 years inside a sizzling headlight, the insulation is pretty brittle and susceptible to cracking and flaking off. Mine was principally okay, but when I get again in there once more, I believe I should both change wires or warmth shrink a bunch of them to forestall points.
My second headlight took round half the time of the primary, which, as everyone knows, is normally the case with these sorts of tasks. While I used to be in there upgrading the projectors, I additionally changed the D2S bulbs with new Phillips X TremeVision Ver. 2 bulbs, which weren’t low cost at round $165 for the pair, however they’re the best rated xenon bulbs you will get, and I figured it was a dumb place to low cost out. I additionally changed the halogen high-beam bulbs, although they don’t do a lot with the bi-xenon system working correctly. Lastly, I left my inventory Hella ballasts in place as a result of these are extraordinarily well-regarded and never susceptible to failure. Also, in the event that they did fail, they’re simple to exchange.
A bunch of you’re possible already shouting at your display, questioning why, if I used to be going to all this hassle, I might not simply improve to LED. The reply to that’s sort of sophisticated. First, My headlight and projectors had been designed to be used with bi-xenon bulbs, so the sample might be greatest fitted to that sort of bulb. LEDs are very completely different and will trigger glare for oncoming visitors. I don’t need to be that man.
Next, LED gentle doesn’t appear to throw as far down the street. I watched just a few movies from a pair sources, and the consensus is that bi-xenon works higher regardless of the system’s complexity. Lastly, I’m an actual stickler for gentle temperatures. This is partly due to the look (I just like the OEM look, as a rule) and likewise as a result of my eyes get fatigued fairly simply whereas driving at night time anyway. The Phillips bulbs I obtained are round 4300-5000k, that are near OEM and pretty shut to sunlight. As far as I’m conscious, LEDs aren’t nearly as good on the daylight factor.
Oh, and the LED improve equipment – which is an choice from the Retrofit Lab – was like twice as a lot cash.
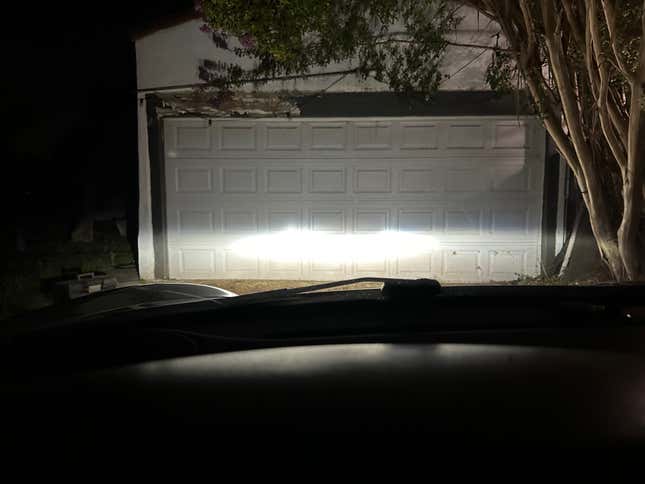
So, in any case that, how does it look, and was it price doing? Yes. Absolutely. Unequivocally. This mod made such an enormous change in how the automotive drives at night time. Where earlier than I’d battle to see issues 50 or 60 toes down the street at like 20 mph, now the street is lit up for tons of of toes on the low beam, and it’s unbelievably shiny on excessive beams. I now not really feel like I’ve to drive with my fog lights on on a regular basis as a result of my headlights want the assistance. It’s additionally only a very satisfying modification to do.
Overall, the beam sample is great, and the cutoff is good and sharp. The Retrofit Lab nailed the equipment as a result of the automotive seems inventory from the skin, which was necessary to me, and the headlights operate precisely like OEM, simply higher. Aside from the iffy instruction video state of affairs, I’d extremely advocate this equipment to different 996 homeowners, and naturally, TRL affords kits for different makes and fashions, too.

My automotive now feels extraordinarily trendy due to the upgraded PCCM Plus infotainment system, the brand new headlights and the refreshed suspension. It additionally feels able to terrorize the canyons for one more 20 years, which is wonderful for one thing with over 140,000 miles on it.
Source: jalopnik.com